


A Jelly Cupboard
Several weeks ago I spied a little cabinet at a thrift store I frequent. I had looked over it, and passed, but two days later still hadn’t gotten it out of my head. I went back, and to my delight and surprise it was still there. Upon an even more thorough inspection, I discovered it was solid wood, the drawer was dovetailed — although there was some sort of hodgepodge hot-glue fixing session that went on before it arrived at the thrift store. But, the rest of it was sturdy and I could see the potential once it was painted and added legs. I have been wanting a buffet, a french buffet in particular, because we don’t have a lot of counter space, and I have thought it would be nice when we have groups over frequently, to have the drinks on a buffet.
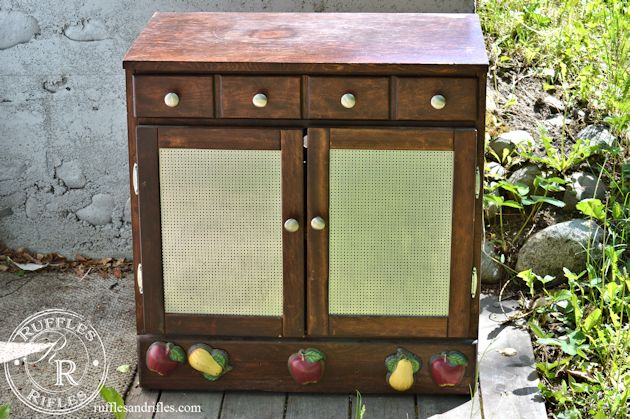
I know, it’s lovely, it even had fruit tins attached to the bottom.
This is by no means as large and beautiful as the french buffet I have pictured, but until I find that perfect piece, I am quite smitten with the end result.
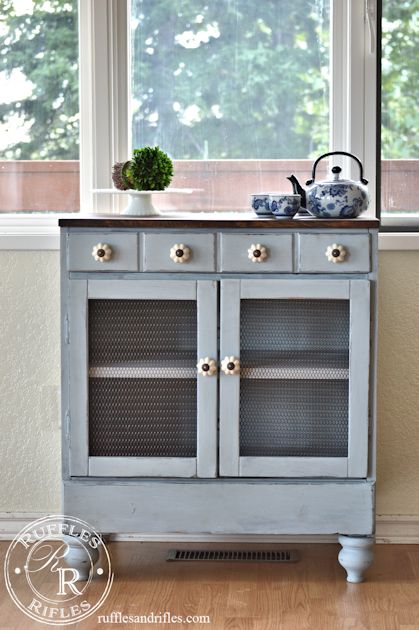
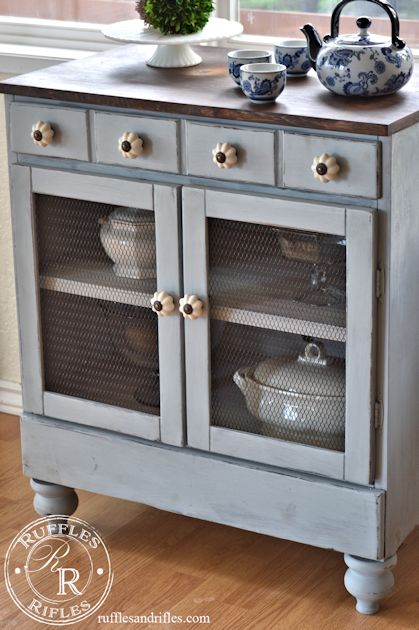
I painted it with Miss Mustard Seed Milk Paint in Shutter Gray, with a little bit of Grainsack mixed in too. I sanded the piece down by hand, but still the finish was quite shiny. I wanted a chippy look originally, but my experience with other milk paint that chipped even with the bonding agent, sent me to use bonding agent so it wouldn’t be out of control chippy. But, I have to say, Miss Mustard Seed’s products seem to be superior to the milk paint I worked with previously. I was shocked that there was no chipping at all. So I did just some light distressing around the edges. I finished it off with some Miss Mustard Seed Hemp Oil.
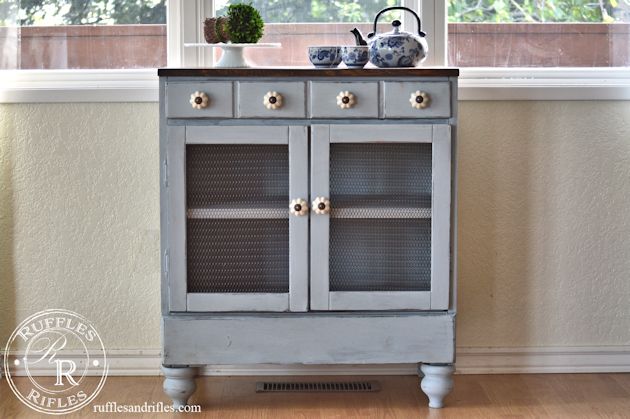
At first I didn’t know if I would paint the inside. But it just seemed too dark. I used MMS Grainsack for the inside. I am so glad I did. I looks finished now!
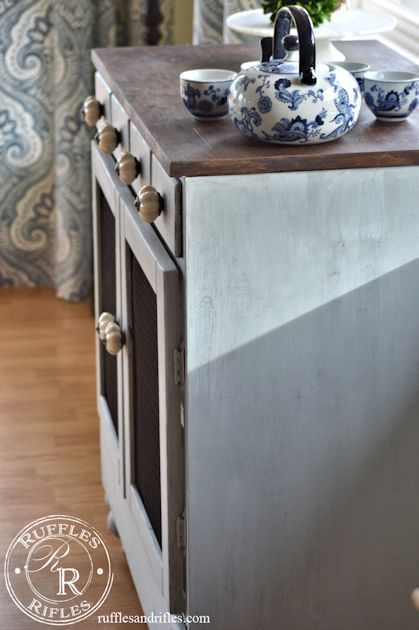
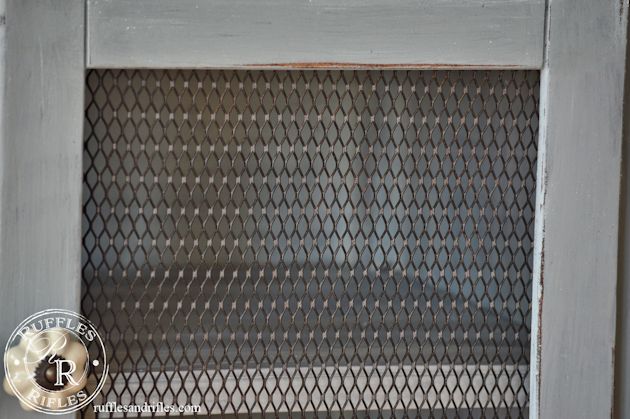
I took, the ugly silver metal out of the doors and my hubby found some metal grate down on his parents property that was abandoned. I was so happy, it was just what I had in mind! I spray painted that with Oil Rubbed Bronze.
The top I decided to sand down and restain. I just love that look. It turned out to have this funny bleach spot on the top though that wouldn’t accept the stain, so I went with it, and dinged the top up even more with scratches and gouges. I think my husband thinks I’m a little crazy for damaging wood I just refinished.
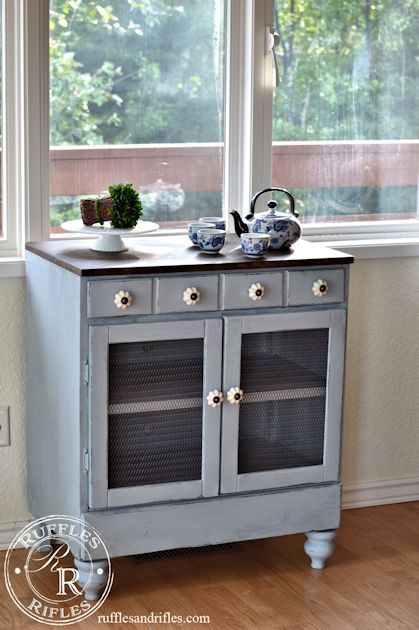
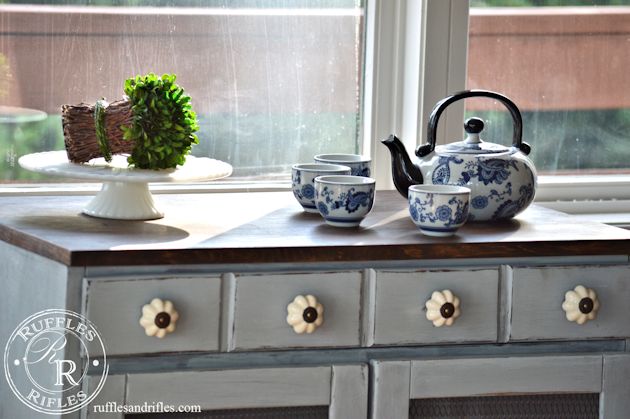
I was at first thinking to keep the cost at the original $35 I spent at the thrift store, but realized new knobs would really make it. So I ordered these from Hobby Lobby. I am so glad I did. I think it really ties in the white inside, the wood top and the metal grate.

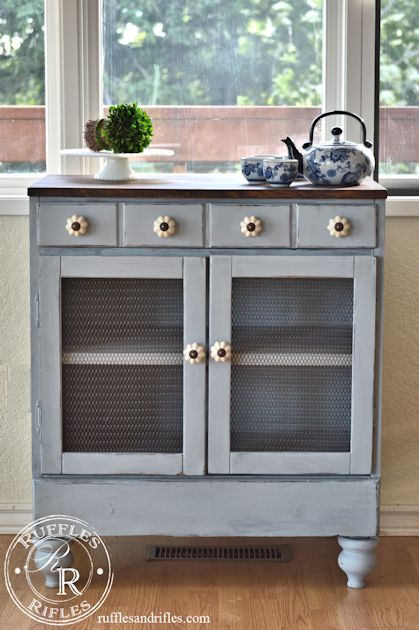
My wonderful husband helped me by adding the legs. He really doesn’t enjoy wood work at all, so it means a lot to me that I bring various projects that need a little man-power after I pretti-fy them. What can I say, he’s a good man.
I’m thinking I might put some childproof locks on the doors so I can put more of my pretty dishes in there. I decided to try it at the end of my photo session and was pleased. With a one year old though, it must be proofed, first.
Thank you so much for stopping by!
This post was featured in:

Linking with:
Cedar Hill Farmhouse – THE SCOOP
30 Responses to A Jelly Cupboard