Wooden Rocking Horse
Hello everyone. Thanks again for stopping by. I hope you are finding time in the midst of the busyness to enjoy and be thankful for the moments. I’ve had a mix of excitement and grief this week as my amazing Grandfather went to his eternal abode. He was a phenomenal man (and I don’t say that lightly), who overcame so much, and brought joy and the love of God wherever he went. (I shared a bit about him in this post on Veteran’s Day). He leaves a great big hole here on earth, and will be greatly missed. But his legacy lives on, and I am so grateful for the days, the visits, the phone calls, letters, and cassette tapes he made me and my brother telling stories and jokes, we titled it “Grandpa Funny.” I love that though we lived far away, but he was intentional about connecting with us and loving us before the days of Skype and Facetime. I will always hear the joy and hope in his voice, concluding almost every conversation with a genuine, “There is so much to be thankful for.” He was truly a gift.
In the midst of that, I’ve been tickled by four little excited men around our house, trying to guess their presents, begging to eat more sugar when they already had their fair share, excited for meaningful traditions and the anticipation of school being out. And with that, I have decided to slow down on the blog output the next few weeks. So, the next few weeks, I’ll only be posting once a week. I had no idea when I begun how much time each post would take. It’s been so much fun, but I do want to slow down during the holidays and focus on my family, not my computer and tasks.
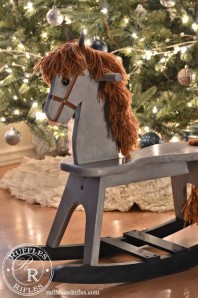
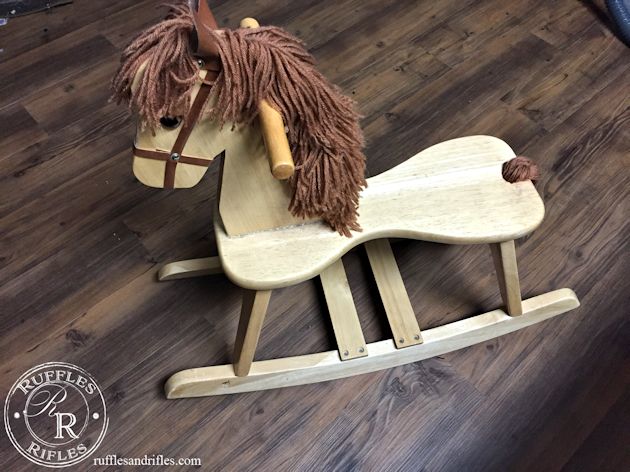
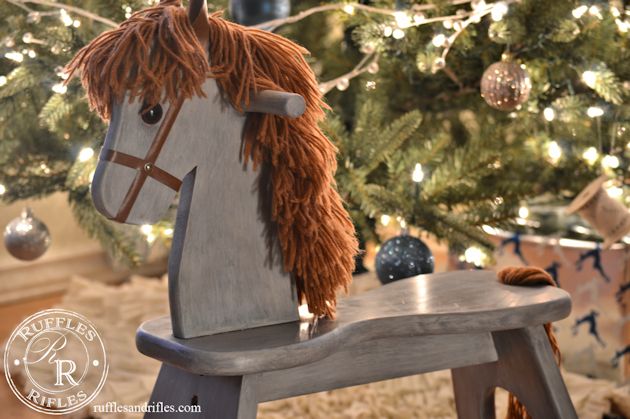
So your post of the week this week is brought to you by way of a two-year-old’s gift. A few months back I found this little wooden rocking horse at a thrift store for $4. I let my then almost 2 year old test it out to see if he would like it. And indeed, he did. He desperately wanted to keep on “gock-gocking” and threw a miniature fit when I made him get off and loaded it into the car.
I decided this would be a great makeover for a Christmas gift for the two year old. Not that he would care if it were the original light wood or painted, but I reasoned, that if it did look a little more vintage, I would be okay with it hanging out in our main living area.
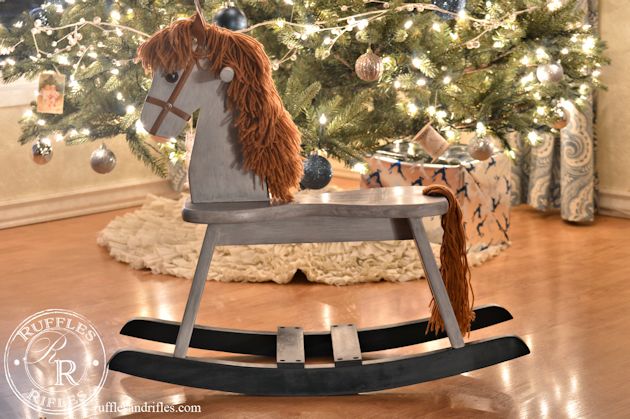
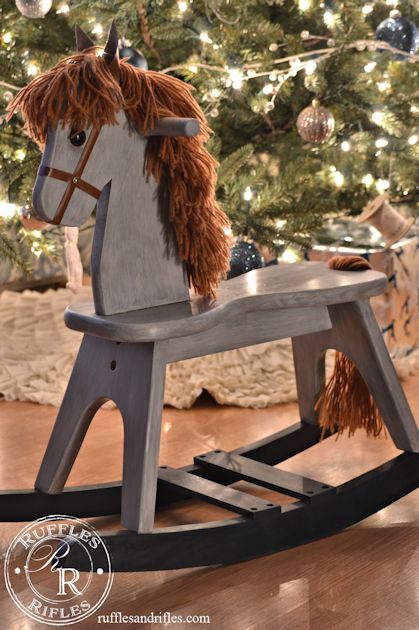
So I painted it in several layers of Miss Mustard Seed Milk Paint. First I did a light sanding. Then I started with Linen and the bonding agent, then did a combination of Curio and Linen, then I did a layer of Mocha Burnishing Paste to add a subtle antique look underneath, and I finished it with Grainsack and some Hemp Oil to seal it all in.
The base I did in Artissimo which has become my favorite for rich dark navy blues.
I am really pleased with how it turned out. And pleased with how great it looks in front of the Christmas tree. Doesn’t everything look better in front of the Christmas tree?
Thanks for stopping by! See you next week!
Blessings,
Cheryl
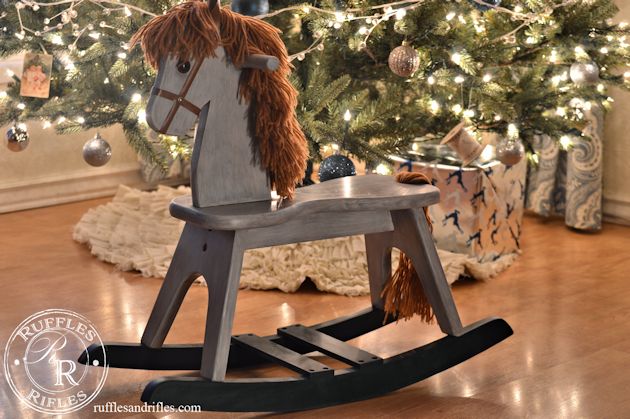
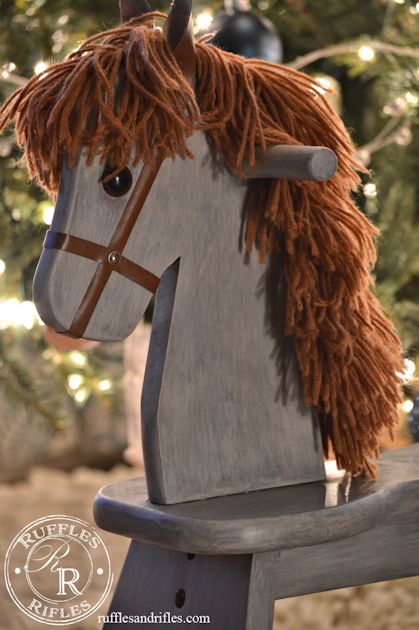
Because I have received so many requests for close ups of the this rocking horse as others work on restoring their own, I am going to post the two photos I send out the most.
The close up of the mane shows the yarn sewn onto twill tape and then stapled into the head of the horse.
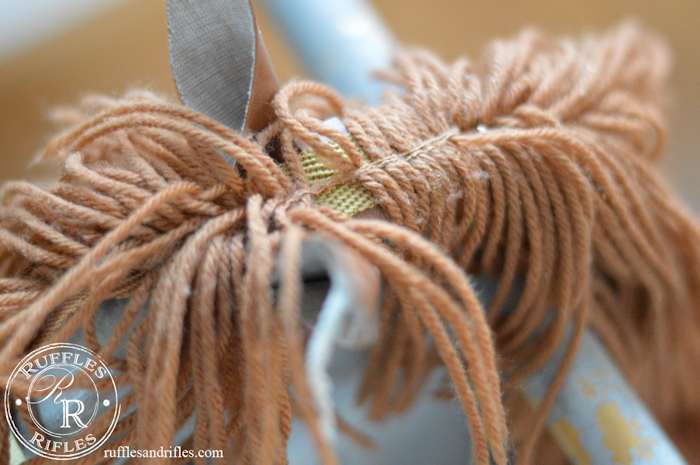
The tail comes out of a hole that is not drilled all the way through the tail end of the horse. This part could probably not be duplicated, as it was most likely two pieces of wood glued together with the tail glued inside. However, this may be a creative guide as to a way you could attempt a similar one.
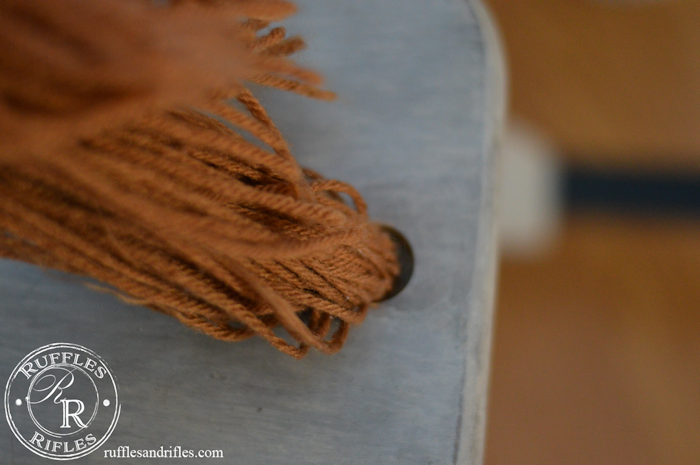
If you still need more clarification or direction, please don’t hesitate to ask. If this has helped in any way, please drop a comment. It helps me to continue to know that what I am doing is helping people or inspiriting others out there! I love seeing your photos too!
Sharing with:
Oh Cheryl! My heart hurts for you and your family over the loss of your grandfather. I hope you will take comfort in the peace of knowing he is home now :0) I just want to say what a lovely little horse this is! You did an amazing job making it ‘living room worthy’ (ha ha) I think this is the first wood horse that I’ve seen that doesn’t have a creepy face ;0)! Well done and thank you for sharing it on my blog this week for Making Broken Beautiful! Wishing you God’s Richest Blessings this Christmas and always!
Smiles!
Terry
Many blessings back on you, Terry. You are so sweet. And thank you for the horse compliments. Ha! Well, to my advantage there were already plastic eyes, so I just left it all and didn’t add anything. 🙂 I am pleased with how it turned out!
Hello Cheryl. I came across the photos of your rocking horse while searching on info on how to make a mane and tail on a rocking horse. My wife recently refurbished a rocking horse that is the same exact style as yours for our grand daughter. We are at a loss on how to make and attach a yarn mane and tail. Do you have any information you could pass on? I printed out the photographs of your horse but could use some more details.
Hi Kevin,
I purchased mine with a mane and tail, but it looks really quite simple to replicate the look of this mane. I looks like yarn was sewn on a piece of trim and then the trim was glued and stapled on. The tail was put through a hole in the rear of the rocking horse. I will email you some photos of the close up of these and hopefully that will help. I’m sure your granddaughter will be pleased. My now 3 year old still talks about unwrapping this and he rides it all the time. So fun to give personalized gifts.
Thanks for inquiring, and hopefully the photos will help.
Love this! My brother made a wooden rocking horse for my son back in 1982. I need to replace the mane and tail, as they have both seen better days! Would you send me close ups of those sections? Thank you!
Dear Kathy,
Thank yo so much! My brother had an incredible rocking horse my parents bought for him in Wisconsin in the early eighties and they shipped it back to Alaska. I think that lent the soft spot in my heart for a solid wood rocking horse!
I sent you an email and photos in a separate email. I hope that helps. Let me know if I can be of any further help.
Cheryl
Hi Cheryl,
Your rocking horse turned out beautifully. I’m refinishing my son’s rocking horse for my granddaughter and I’m unsure how to attach the main and tail. I’m also concerned with creating the eyes. Could you please send me close of photos of the mane, tail and eyes? Any direction you could give would be most helpful. Thank you so much!
Hi Rhonda, I will be sending you some photos of some closer up of the rocking horse. I hope that helps! What a wonderfully sweet, sentimental gift you are giving!
Hi Cheryl, I hope you aren’t sick of answering the same or similar questions…..I am doing up a horse very similar to yours and would really appreciate some close up photos as well…your pony is a credit to you and like mine (I am hoping) will bring enjoyment for many years to come….Hoping you can help me, I remain yours sincerely Ann…. 🙂
Dear Ann,
Thank you for your inquiry. Since your request has been one of many, I have decided to post those close up photos at the end of the original post. I hope you find them helpful. If you have any more questions, please don’t hesitate to ask. I would love to see how yours turns out. I am so delighted this post has been so helpful for so many people!
Cheryl
Could you please email me detailed photos of how to make & attach the mane, tail & forelock? I am refinishing a rocking horse for my grandchild due to be born in Dec. My daughter rides & owned an awesome pony growing up. His mane & tail were so full & fluffy. I have the yarn but am trying to shape the hair so that it looks somewhat natural — maybe sewing all on a strip of thick fabric, then screwing it into the wood. You did a fabulous job! Thank you for any photos & instructions.
Dear Brenda,
Unfortunately, these are all the photos I have of the horse. It was ridden until it was no more. The best way to do the mane is to put however much thickness of yarn you want on strips of trim that won’t fray and then staple (or screw) that into the head piece. The photos I have posted at the end are the best I have of what was done. I didn’t redo the tail or mane, it was just as it came.
Can you please let me know how you did the ears.
Hi Sherrie. The ears are as they were when I bought them. They appear to be a kind of fake leather (the same material as the halter). They are a triangle folded in half, and attached by a screw and washer.
I love your rocking horse! I’m refinishing a rocking horse for my grandson and really like the way you did your rocking horse mane. How many layers of yarn did you sew to the twill tape to get the thickness you have?
Thank you very much Nancy. Honestly, the mane I didn’t have to refinish, it came like that. If I were you, I would just put on enough yarn til it looks right. Try one thick layer, and if that isn’t enough add another. 🙂 The beautiful thing about art is it’s your call and there is no perfect formula. Thank you so much for stopping by and for connecting. I’ll try to answer any questions you have!
Cheryl
Have you made a pattern of this rocking horse by chance. I love it!!
Do you know the dimensions?
Hi Tina,
I’m sorry it’s taken a bit to get back to you, my computer crashed and I everything got behind. As far as the rocking horse, I bought this at a thrift store fully intact. I really don’t do that much wood working, so I don’t have a pattern. Sorry. If you shop thrift stores, that might be a good start. I paid $4 for this one! It’s about 2 feet (rocker length) by two feet (the top of the horse’s head).
Best of luck to you!
Cheryl
I love the little pony! We are making a little rocking horse for my brand-new nephew. Can I asked what type of yarn you used for the mane/tail? I like that you sewed the yarn onto twill tape and then stapled it to the horse. Great idea! Thank you…
Hi Margaret,
As far as yarn, the yarn was as is at the thrift store when I bought it. I am hoping to restore another in the near future that will need a mane and tail restoration. As far as yarn, I think your best bet would be going to a yarn shop and buying a quality yarn that doesn’t fray or shed very easily. No one wants a shedding toy!
I hope that helps!
Cheryl
Hi,
I just came across your rocking horse post. It’s beautiful. I hope your still answering questions on this. In what order did you add you do the linen, binding, mustard seed paint, etc? I would like to do something similar, but the pst is confusing on the order you paint it? It said for you use the paint. Then you sand it? Then you add the other stuff? What exactly is the order?
Hi Laura,
Sorry for the delay in replying. I don’t know if I fully understand your question, but I will try and answer as best I can. The first step is sand, really well and get all the shiny finish off. Then I started painting in layers. I don’t remember the order of the colors I used, but I added bonding agent to the first layer of paint just so it would adhere best. When I paint I just keep layering with various colors until it looks right. So usually there is not formula, but the post does specify what colors I used. Sometimes I lightly sand after I’m done painting just to give an antique look. And then I finished it with hemp oil. Does that answer your questions?